gRPC与前端应用的完整实现过程

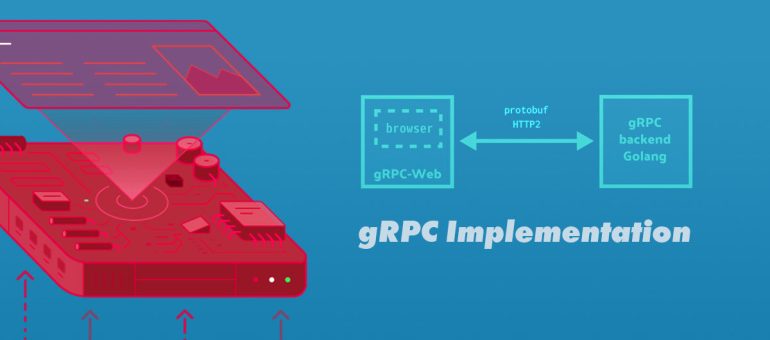
最近我在参与设计一个软件的架构,期间也遇到不少困难,但是只要用心去思考还是可以解决的。前端和隔离层(包括 UI层,文件管理系统,插件系统,数据处理等)的微服务基于 React + Nextjs + Nodejs + Lerna + gRPC,后端协议遵循HTTP/2的长连接及其双向通信。那么不得不说一说 gRPC。也许很多中小型项目都并未采用,它相对于REST是有一些麻烦的地方。但是鉴于大型项目的数据交互,请求与相应,也许它是一个非常好的选择。关于 gRPC 请自行去搜索相关资料了解,这篇文章主要是完整实现一个从零到一的演示。
这个过程中,编译 proto 文件会用到 grpc, grpc-web 和相关的一些插件, 服务测试将使用 envoy 代理和 webpack。好了废话不多说,我们开始吧:
目录结构
grpc-getting-started/
├── README.md
├── LICENSE
├── package.json
├── package-lock.json
├── envoy.yaml
├── server.js
├── build/
├── scripts/
├── dist/
│   ├── client-main.js
│   └── index.html
├── proto/
│   ├── example.proto
│   └── other.proto
├── src/
│   ├── proto/
│   ├── client/
│   └── server/
└──
(1) 定义服务
我们首先定义一个服务,指定可以远程调用的方法及其参数和返回类型。
这是使用在 .proto 文件中使用协议缓冲完成的,它们还用于描述有效负载消息的结构。
创建一个 proto 文件 proto/example.proto:
// 步骤 1. 基本配置
// ================================================ ====
// 第一行告诉编译器这个文件中使用了什么语法。
// 第二行属于命名空间,用来防止不同的消息类型有命名冲突

syntax = "proto3";
package hello;


// 步骤 2. 定义消息结构
// ================================================ ====
// 这定义了请求负载。 此处进入消息的每个属性都与其类型一起定义。
// 需要为每个属性分配一个唯一的编号,称为标签。 协议缓冲区使用此标记来表示属性,而不是使用属性名称。
// 所以,不像 JSON 我们每次都会传递属性名称 firstName,protocol buffer 会使用数字 1 来表示 firstName。 响应负载定义类似于请求。


message HelloRequest {
    string firstName = 1;
    string lastName = 2;
}

message HelloResponse {
    string greeting = 1;
}


// 步骤 3. 定义服务契约
// ================================================ ====
// 最后,让我们定义服务契约。 对于我们的 HelloService,我们定义了一个 GetHelloReq() 操作:

service HelloService {
    rpc GetHelloReq(HelloRequest) returns (HelloResponse);
}
(2) 生成代码 —— 将 .proto 文件编译为 .js
步骤 2.1。 安装 grpc-web 运行时库
$ cd /{your_directory}/grpc-getting-started
$ npm i --save-dev grpc-web
步骤 2.2。 安装生成 TypeScript 的插件 ts-protoc-gen
$ npm i --save-dev ts-protoc-gen @improbable-eng/grpc-web
步骤 2.3。 安装代码生成器插件 protoc
$ PROTOC_ZIP=protoc-22.2-osx-x86_64.zip
$ curl -OL https://github.com/protocolbuffers/protobuf/releases/download/v22.2/$PROTOC_ZIP
$ sudo unzip -o $PROTOC_ZIP -d /usr/local bin/protoc
$ sudo unzip -o $PROTOC_ZIP -d /usr/local 'include/*'
$ rm -f $PROTOC_ZIP
也可以使用如下命令安装(macOS):
$ brew install protobuf
安装完成后查看版本
$ protoc --version
步骤 2.4。 继续安装插件 protoc-gen-js 和 protoc-gen-grpc-web
$ sudo npm i -g protoc-gen-js protoc-gen-grpc-web
步骤 2.5。 编译执行
运行以下命令编译.proto文件,生成我们可以识别的.js文件。
$ npm run build:protos
它会生成四个文件:
src/proto/example_pb.jssrc/proto/example_pb.d.tssrc/proto/example_pb_service.jssrc/proto/example_pb_service.d.ts
可以下载protobuf-javascript进行测试。 教程请访问这里。
sh

$ mkdir src/proto
要生成 protobuf 消息类,请运行以下命令:
sh

$ protoc  --proto_path=./proto --plugin=protoc-gen-ts=./node_modules/.bin/protoc-gen-ts --js_out=import_style=commonjs,binary:src/proto --ts_out="src/proto" proto/example.proto
要生成 客户端存根,请运行以下命令:
sh

$ protoc  --proto_path=./proto --plugin=protoc-gen-ts=./node_modules/.bin/protoc-gen-ts --ts_out="service=grpc-web:src/proto"  proto/example.proto
(3) 服务器入口
接下来,我们在后端 gRPC 服务中使用 Node 实现我们的 HelloService 接口。 这将处理来自客户的请求。 教程请访问这里。
步骤 3.1。 安装插件 grpc-node
$ npm i --save-dev @grpc/grpc-js @grpc/proto-loader
步骤 3.2。 创建文件 src/server/index.js:
const path = require('path');
const grpc = require("@grpc/grpc-js");
const protoLoader = require("@grpc/proto-loader");
const PROTO_PATH = path.resolve(__dirname, '../../proto/example.proto');


const packageDefinition = protoLoader.loadSync(PROTO_PATH, {
    keepCase: true,
    longs: String,
    enums: String,
    defaults: true,
    oneofs: true,
});
const newsProto = grpc.loadPackageDefinition(packageDefinition);
/*
{
    hello: {
        HelloRequest: {
            format: 'Protocol Buffer 3 DescriptorProto',
            type: [Object],
            fileDescriptorProtos: [Array]
        },
        HelloResponse: {
            format: 'Protocol Buffer 3 DescriptorProto',
            type: [Object],
            fileDescriptorProtos: [Array]
        },
        HelloService: [class ServiceClientImpl extends Client] {
            service: [Object],
            serviceName: 'HelloService'
        }
    }
}
*/


class gRPC extends grpc.Server {
    constructor() {
        super();
        this.addService(newsProto.hello.HelloService.service, {
            getHelloReq: this.getHelloReq
        });
    }

    /**
     * request handler.
     */
    getHelloReq(call, callback) {
        const { firstName, lastName } = call.request;

        if( firstName !== '' ) {
            callback(null, {
                greeting: `Hello: ${firstName} ${lastName}`
            });
        } else {
            callback({
                message: 'Name not found',
                code: grpc.status.INVALID_ARGUMENT
            });
        }
    }
}


function main() {
    const server = new gRPC();
    server.bindAsync(
        '127.0.0.1:9090', grpc.ServerCredentials.createInsecure(), (err, port) => {
            if (err) throw err;

            console.log(`Server running at http://127.0.0.1:${port}`);
            server.start();
        }
    );
}

main();


/*

function copyMetadata(call) {
    const metadata = call.metadata.getMap();
    const responseMetadata = new grpc.Metadata();
    for (let key in metadata) {
        responseMetadata.set(key, metadata[key]);
    }
    return responseMetadata;
}
function getHelloReq(call, callback) {
    const { firstName, lastName } = call.request;

    if( firstName !== '' ) {
        callback(null, {
            greeting: `Hello: ${firstName} ${lastName}`
        }, copyMetadata(call));
    } else {
        callback({
            message: 'Name not found',
            code: grpc.status.INVALID_ARGUMENT
        });
    }
}
function main() {
    const server = new grpc.Server();
    server.addService(newsProto.hello.HelloService.service, {
        getHelloReq: getHelloReq
    });
    ...
}

*/
(4) 客户端入口
创建文件 src/client/index.js:
const { HelloRequest } = require('../proto/example_pb.js');
const { HelloServiceClient } = require('../proto/example_pb_service.js');


const client = new HelloServiceClient('http://' + window.location.hostname + ':12345', null, null);


function todo(str1, str2) {

    return new Promise((resolve, reject) => {
        const req = new HelloRequest();
        req.setFirstname(str1);
        req.setLastname(str2);

        client.getHelloReq(req, {}, function (err, response) {
            if (err) {
                resolve(err);
                //reject(err);
            } else {
                resolve(response.getGreeting());
            }
        });

    })
}

// 创建一个表单
//===================
const container = document.createElement("div");

const input1 = document.createElement("input");
input1.type = "text";
input1.id = "input1";
input1.placeholder = 'FirstName'
container.appendChild(input1);

const input2 = document.createElement("input");
input2.type = "text";
input2.id = "input2";
input2.placeholder = 'LastName'
container.appendChild(input2);

const hr = document.createElement("hr");
container.appendChild(hr);

const btn = document.createElement("button");
btn.innerHTML = "Submit";
btn.id = "btn";
container.appendChild(btn);

document.body.appendChild(container);

const $btn = document.getElementById('btn');
$btn.addEventListener('click', (e) => {
    e.preventDefault();
    main(document.getElementById('input1').value, document.getElementById('input2').value);
});


// 显示后端服务器响应的内容
//===================
async function main(str1, str2) {
    const data = await todo(str1, str2);
    console.log(data);

    const div = document.createElement("h3");
    div.innerHTML = data;
    document.body.appendChild(div);
}
(5) 生成客户端文件
最后,将所有这些放在一起,我们可以将所有相关的 JS 文件编译成一个可以在浏览器中使用的 JS 库。
步骤 5.1。 安装依赖
$ npm i --save-dev webpack webpack-cli webpack-dev-server html-webpack-plugin browserify google-protobuf
步骤 5.2。 为自定义 webpack 配置创建一个文件
build/client.config.js:
const path = require('path');
const HtmlWebpackPlugin = require("html-webpack-plugin");

const clientPort = process.env.PORT || 10005;
const clientHost = process.env.HOST || 'localhost';
const devMode = process.env.NODE_ENV !== 'production';

module.exports = {
    mode: 'production',
    performance: {
        hints: !devMode ? "warning" : false
    },
    resolve: {
        fallback: {
            "fs": false
          },
        extensions: ['.js']
    },
    entry: {
        'client-main': './src/client/index.js'
    },
    output: {
        filename: '[name].js',
        path: path.resolve(__dirname, '../dist')
    },
    plugins: [
        new HtmlWebpackPlugin({
            title: "Webpack Output",
        }),
    ],
    devServer: {

        // Enable compression
        compress: false,

        //
        host: clientHost,
        port: clientPort

    }
};
步骤 5.3。 编译JS库
$ npm run build:client
或者
$ npx webpack --progress --mode production --config ./build/client.config.js
它将生成一个 js 文件 dist/client-main.js 和一个 html 文件 dist/index.html
步骤 5.4。 Webpack 服务器配置
创建一个新的服务器文件 server.js
const Webpack = require('webpack');
const WebpackDevServer = require('webpack-dev-server');
const webpackConfig = require('./client.config.js');

const compiler = Webpack(webpackConfig);
const devServerOptions = { ...webpackConfig.devServer, open: true };
const server = new WebpackDevServer(devServerOptions, compiler);

const runServer = async () => {
  console.log('Starting server...');
  await server.start();
};

runServer();
(6) 部署后端服务并测试
步骤 6.1。 安装 envoy
编译 envoy 需要完整安装 Xcode.app。 仅安装命令行工具是不够的。
如 macOS 12.6.3,需要下载:
Xcode_14.2
$ brew update
$ brew install envoy
$ envoy --version
$ go version
⚠️ a) 如果运行
brew update或brew install envoy出错,输入以下命令修复它:macOS 或 Linux
打开你的终端并执行
$ xcode-select --install
  $ cd /usr/local/Homebrew/Library/Taps/homebrew/homebrew-core/
  $ git pull
  $ brew update-reset
  $ brew install envoy
⚠️ b) 使用go启动服务时报错 dial tcp xx.xx.xx.xx:443: i/o timeout
手动配置源
$ export GO111MODULE=on
  $ export GOPROXY=https://goproxy.cn
以上配置步骤只会在当前终端生效,如何长期生效,这样就不用每次都配置环境变量了。
$ echo "export GO111MODULE=on" >> ~/.profile
  $ echo "export GOPROXY=https://goproxy.cn" >> ~/.profile
  $ source ~/.profile
⚠️ c)
bazelisk不支持旧版本。升级您的操作系统。
步骤 6.2。 配置 Envoy 代理
创建一个新文件 envoy.yaml:
static_resources:
  listeners:
    - name: listener_0
      address:
        socket_address: { address: 127.0.0.1, port_value: 12345 }
      filter_chains:
        - filters:
          - name: envoy.filters.network.http_connection_manager
            typed_config:
              "@type": type.googleapis.com/envoy.extensions.filters.network.http_connection_manager.v3.HttpConnectionManager
              codec_type: auto
              stat_prefix: ingress_http
              route_config:
                name: local_route
                virtual_hosts:
                  - name: local_service
                    domains: ["*"]
                    routes:
                      - match: { prefix: "/" }
                        route:
                          cluster: hello_service
                          timeout: 0s
                          max_stream_duration:
                            grpc_timeout_header_max: 0s
                    cors:
                      allow_origin_string_match:
                        - prefix: "*"
                      allow_methods: GET, PUT, DELETE, POST, OPTIONS
                      allow_headers: keep-alive,user-agent,cache-control,content-type,content-transfer-encoding,custom-header-1,x-accept-content-transfer-encoding,x-accept-response-streaming,x-user-agent,x-grpc-web,grpc-timeout
                      max_age: "1728000"
                      expose_headers: custom-header-1,grpc-status,grpc-message
              http_filters:
                - name: envoy.filters.http.grpc_web
                  typed_config:
                    "@type": type.googleapis.com/envoy.extensions.filters.http.grpc_web.v3.GrpcWeb
                - name: envoy.filters.http.cors
                  typed_config:
                    "@type": type.googleapis.com/envoy.extensions.filters.http.cors.v3.Cors
                - name: envoy.filters.http.router
                  typed_config:
                    "@type": type.googleapis.com/envoy.extensions.filters.http.router.v3.Router
  clusters:
    - name: hello_service
      connect_timeout: 0.25s
      type: logical_dns
      http2_protocol_options: {}
      lb_policy: round_robin
      # win/mac hosts: Use address: host.docker.internal instead of address: localhost in the line below
      load_assignment:
        cluster_name: cluster_0
        endpoints:
          - lb_endpoints:
            - endpoint:
                address:
                  socket_address:
                    address: 127.0.0.1
                    port_value: 9090
⚠️ 如果您在 Mac/Windows 上运行 Docker,请将最后一个地址:
localhost更改为... socket_address: address: host.docker.internal或者如果您在 Mac 上的 Docker 版本比 v18.03.0 更早,请将其更改为:
    ...
    socket_address:
        address: docker.for.mac.localhost
步骤 6.3。 运行特使代理。
envoy.yaml 文件将 Envoy 配置为在端口 12345 监听浏览器请求,并将它们转发到端口 9090。
$ npm run proxy
or
$ envoy -c ./envoy.yaml
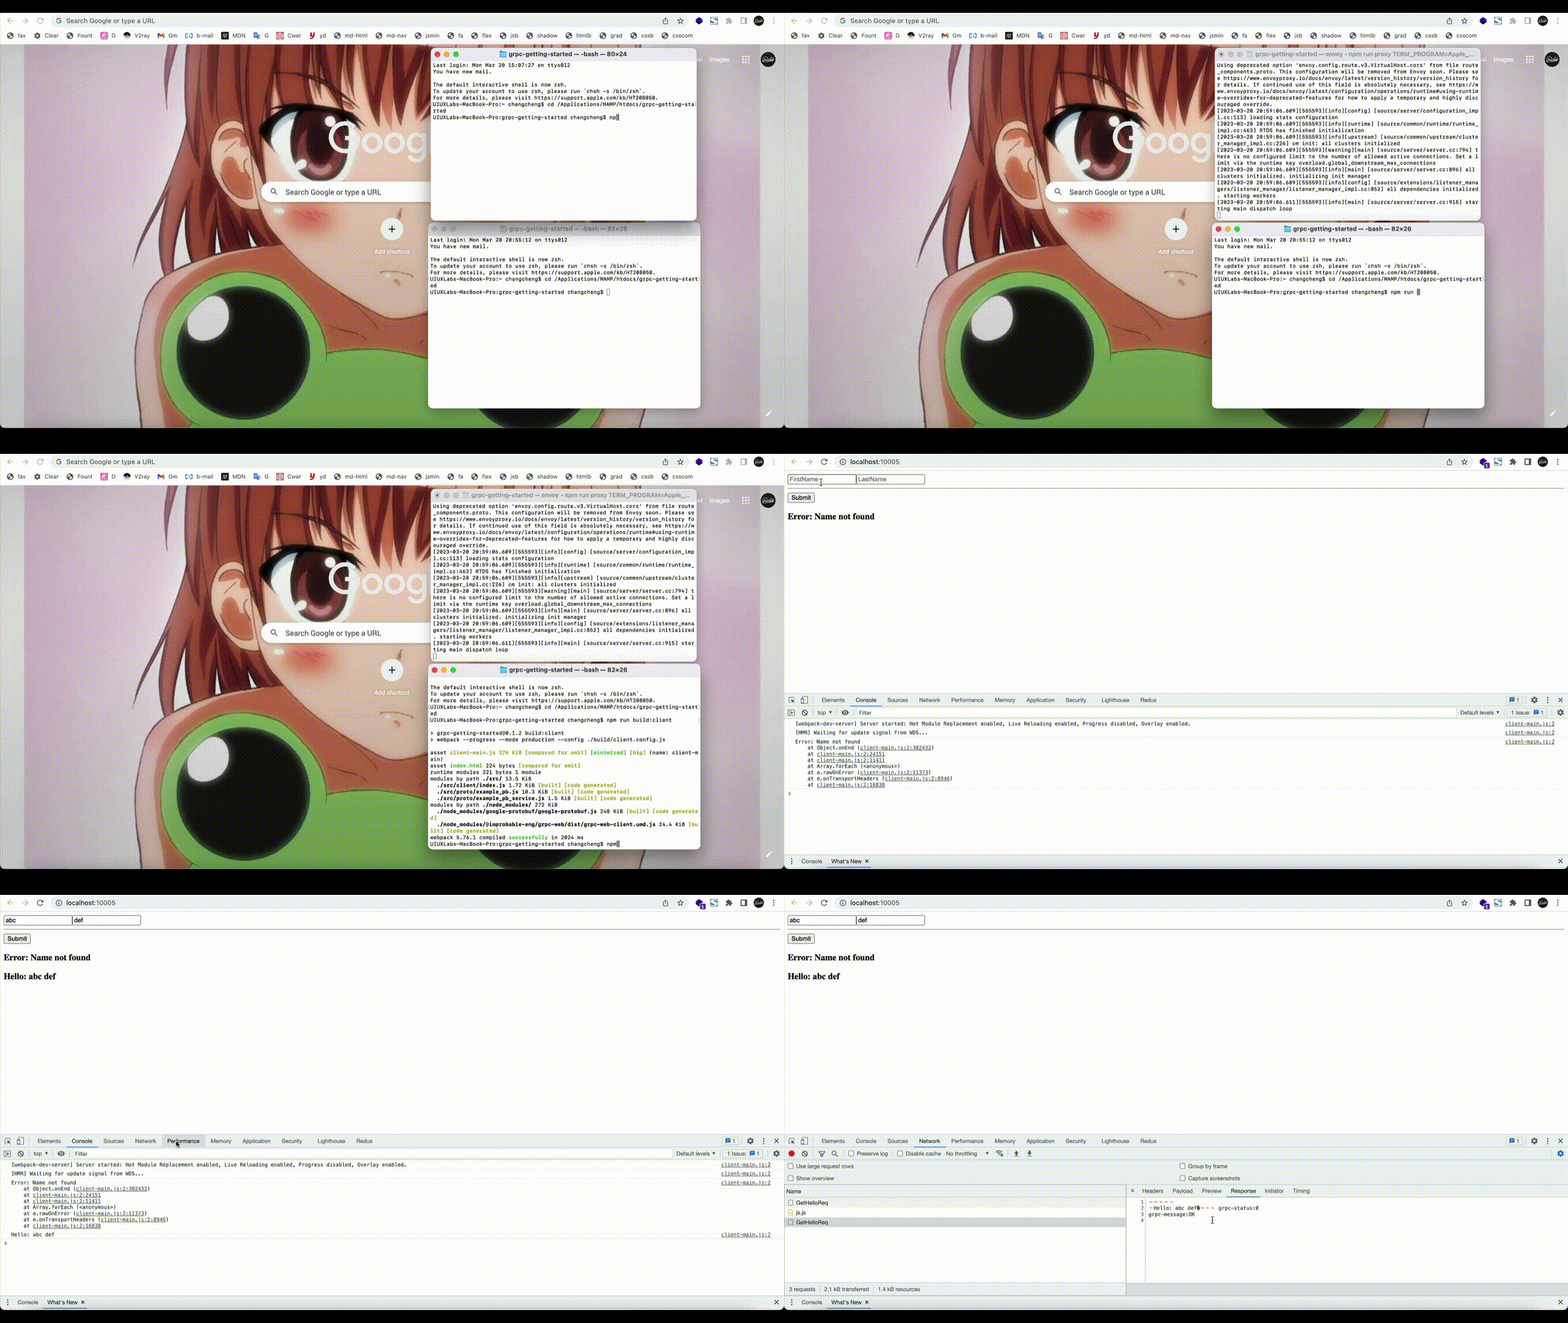
步骤 6.4。 当这些都准备好后,您可以打开浏览器选项卡并导航到 http://localhost:10005
- NodeJS gRPC 服务(端口
9090) - webpack 服务器(端口
10005)
运行以下命令进行测试:
$ npm run start
或者
$ node ./server.js & node ./src/server/index.js
步骤 6.5。 测试连接
使用下面的命令检测:
$ curl -I http://localhost:12345/hello.HelloService/GetHelloReq?firstName=Amy&lastName=Grant
最后,希望这篇文章对你有用,您可以下载我的开源文件包 https://github.com/xizon/grpc-getting-started
本文出自没位道 - Chuckie Chang个人网站,转载请保留出处,谢谢!
文章采用 知识共享署名-非商业性使用-相同方式共享 4.0 国际许可协议进行许可。


文章评论